
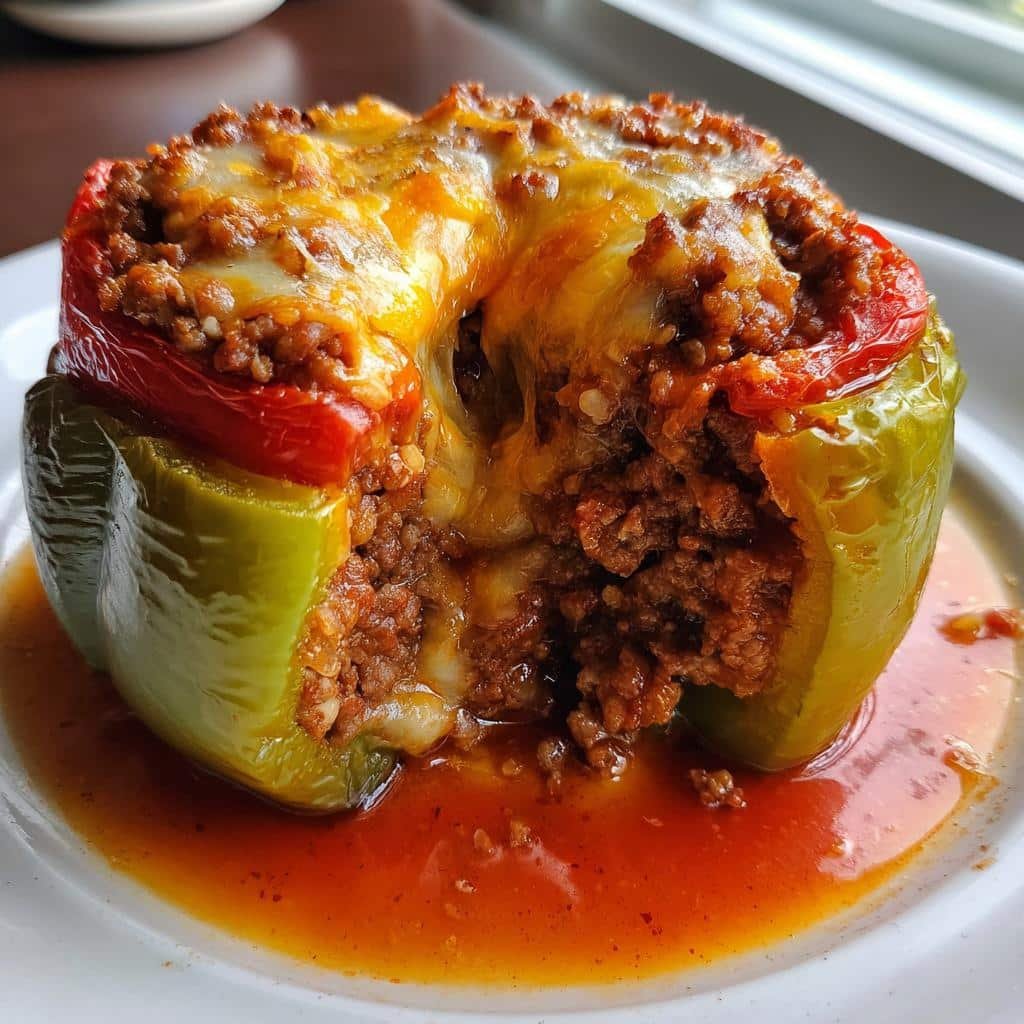
Oh my gosh, you have GOT to try these air fryer stuffed peppers! I was skeptical at first – could they really be as good as oven-baked? But trust me, the air fryer makes these little flavor bombs even better. The peppers get that perfect tender-crisp bite while the cheesy ground beef filling stays juicy. And the best part? From start to finish, you’re looking at just 30 minutes tops.
I stumbled onto this recipe when I was desperate for a quick weeknight dinner that didn’t taste “fast.” My air fryer was already out from making lunch, so I thought – why not? Now these stuffed peppers are in our regular rotation. Even my picky eater asks for seconds! They’re naturally low-carb if you skip the rice, but honestly, I love that bit of texture it adds. Just wait till you smell that cheesy, beefy goodness filling your kitchen… your stomach’s gonna growl!
Ingredients for Air Fryer Ground Beef Stuffed Peppers
Okay, let’s talk ingredients – and I promise, nothing fancy here! These are all things I usually have in my fridge or pantry already. The magic happens when simple ingredients come together just right. Here’s what you’ll need:
For the Peppers:
- 4 large bell peppers (any color – I love using a mix of red, yellow and green for color!)
For the Filling:
- 1 lb ground beef (I use 85/15 lean-to-fat ratio – enough fat for flavor but not too greasy)
- 1/2 cup diced onion (yellow or white both work great)
- 1/2 cup cooked rice (white, brown, or even cauliflower rice for low-carb)
- 1/2 cup tomato sauce (the plain kind – not marinara)
Seasonings & Toppings:
- 1 tsp garlic powder (or 2 fresh cloves if you’re feeling fancy)
- 1 tsp salt (I use kosher)
- 1/2 tsp black pepper (freshly ground if possible)
- 1/2 cup shredded cheese (cheddar, Mexican blend – whatever melts well!)
A quick tip: I always eyeball the cheese topping – who measures cheese anyway? Just sprinkle until it looks right to you! The amounts here make 4 generous stuffed peppers, but you can easily double everything if you’re feeding a crowd or want leftovers (they reheat like a dream).
How to Make Air Fryer Ground Beef Stuffed Peppers
Alright, let’s get cooking! I promise this is way easier than it looks. The air fryer does most of the work for us – we just need to put everything together right. Follow these steps and you’ll have perfect stuffed peppers faster than you can say “dinner’s ready!”
Preparing the Peppers
First things first – grab those beautiful peppers! I like to pick ones that can stand up on their own so they don’t tip over in the air fryer. Here’s my method:
- Slice about 1/2 inch off the top of each pepper – save those tops!
- Use your fingers to pull out the seeds and white membranes (a spoon helps get the stubborn bits).
- Give them a quick rinse inside and out, then pat dry.
Pro tip: Don’t throw away those pepper tops! I finely chop them and add to the filling – zero waste and extra flavor!
Cooking the Filling
Now for the good stuff – that savory beef filling that makes these irresistible:
- Heat a skillet over medium-high and brown your ground beef, breaking it up as it cooks.
- When the beef is almost done (just a little pink left), toss in the onions. Cook until they’re soft and translucent – about 3 minutes.
- Drain any excess grease (I leave about 1 tbsp for flavor).
- Stir in the cooked rice, tomato sauce, and all those seasonings. Let it simmer together for 2 minutes so the flavors marry.
Quick taste test time! This is when I adjust the seasoning – maybe an extra pinch of salt or a dash of garlic powder if needed.
Air Frying the Stuffed Peppers
Here’s where the magic happens – and it’s so simple!
- Pack each pepper with the beef mixture – don’t be shy, really stuff them in there!
- Sprinkle that glorious cheese on top (I always add a little extra – no judgment here).
- Arrange them in your air fryer basket with some space between – they shouldn’t touch.
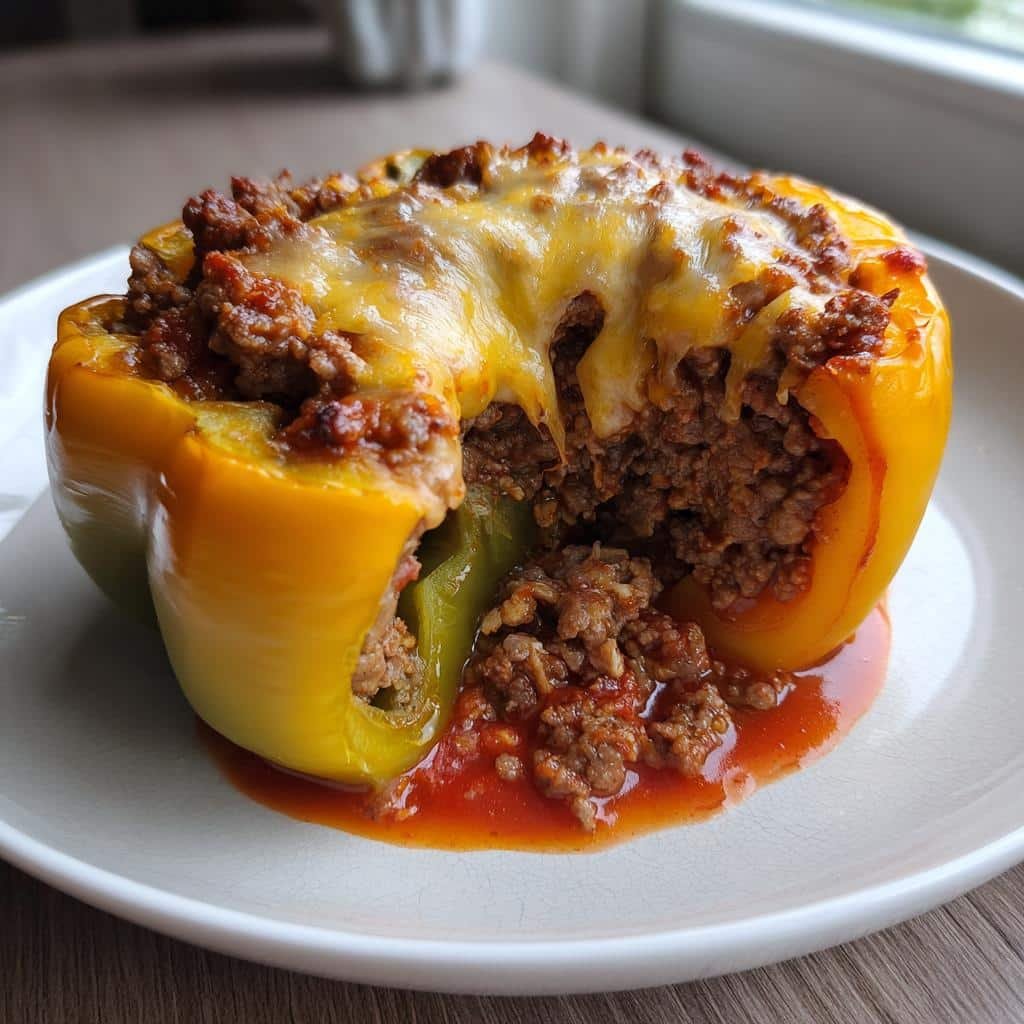
- Cook at 375°F for 12-15 minutes. You’ll know they’re done when the cheese is bubbly and golden, and the peppers have softened but still hold their shape.
Careful when you take them out – that cheese is molten lava hot! Let them rest for 5 minutes before serving (I know, the hardest part). The wait is worth it – they’ll hold together better and you won’t burn your tongue!
Why You’ll Love This Recipe
Oh my gosh, where do I even start? These air fryer stuffed peppers are about to become your new best friend in the kitchen. Here’s why everyone in my house goes crazy for them:
- Lightning fast: From fridge to table in 30 minutes flat – faster than pizza delivery on a good day!
- Customizable to the max: Swap the beef for turkey, use quinoa instead of rice, or go wild with different cheeses. It’s your kitchen – you make the rules!
- That perfect pepper texture: The air fryer gives you crispy edges with tender centers – no more soggy pepper bottoms!
- One-and-done meal: Protein, veggies, and carbs all packed into one neat little edible bowl. Less dishes = more Netflix time.
- Meal prep superstar: These reheat like a dream – just pop leftovers back in the air fryer for 5 minutes and bam – tastes fresh-made!
- Picky eater approved: Even my nephew who “hates peppers” gobbles these up. There’s magic in that cheesy filling!
Seriously, I’ve made these at least a dozen times now and they never get old. Last week my neighbor smelled them cooking and texted asking for the recipe – that’s when you know it’s a winner!
Tips for Perfect Air Fryer Stuffed Peppers
Okay, let me spill all my hard-earned secrets for stuffed pepper success! After burning (literally), undercooking, and overstuffing my way through many batches, I’ve nailed down what makes these little guys truly shine. Take it from someone who’s made all the mistakes so you don’t have to!
Choosing Your Peppers
First rule – pick peppers that are roughly the same size. Nothing’s worse than one being done while others are still crunchy! Look for ones that:
- Stand upright on their own (no wobblers!)
- Have thick, sturdy walls (thin ones collapse)
- Are bright and shiny (dull ones are older)
My favorite trick? Give them a gentle squeeze – they should feel firm but not rock hard. And don’t stress about color – red, yellow, orange, or green all work beautifully!
The Art of Stuffing
Here’s where most people go wrong – including me in my early attempts! You want to:
- Pack the filling in firmly (use a spoon to press it down)
- Leave about 1/4 inch at the top (it expands while cooking)
- Resist the urge to mound it over (that cheese needs room to melt!)
Pro tip: If you accidentally overstuff (been there!), just scoop out a tiny bit before adding cheese. Your future self will thank you when it’s not oozing everywhere!
Air Fryer Tricks
The air fryer is your best friend here, but it needs some TLC:
- Give the basket a quick spritz with oil first (prevents sticking)
- Space peppers evenly – no touching! (I can fit 4 in my 6-quart)
- Check at 10 minutes – all air fryers run a bit different
- If cheese is browning too fast, tent with foil
Oh! And don’t forget to shake any loose cheese bits off the basket between batches – burnt cheese smoke is not the aroma we’re going for!
One last thing – let them rest for 5 minutes after cooking. I know it’s torture, but that filling sets up perfectly and you won’t burn your mouth on molten cheese (voice of painful experience here). Trust me on this!
Ingredient Substitutions & Variations
Okay, let’s get creative! The beauty of stuffed peppers is how easily you can mix things up based on what you’ve got or what you’re craving. I’ve tried SO many versions of this recipe – here are my favorite twists that still deliver amazing results:
Protein Swaps
Not feeling beef? No problem!
- Ground turkey or chicken: Just add an extra tbsp of olive oil since they’re leaner
- Plant-based crumbles: My vegetarian friends swear by the texture – season well!
- Italian sausage: Remove from casings for a flavor explosion (reduce added salt)
Last week I did half beef, half spicy sausage – oh man, game changer!
Grain Alternatives
Rice not your thing? Try:
- Quinoa: Cooks in the same time as rice – bonus protein!
- Cauliflower rice: Perfect for keto/low-carb (sauté it first to remove moisture)
- Orzo: Tiny pasta pearls that soak up flavors beautifully
My weirdest but yummiest experiment? Using leftover stuffing mix from Thanksgiving – don’t knock it till you try it!
Cheese Options
Cheese lovers unite – here’s how to mix it up:
- Dairy-free: Violife or Daiya shreds melt surprisingly well
- Fancy cheeses: Gruyère or smoked gouda take it up a notch
- Cottage cheese: Mix into the filling for extra creaminess
Confession: Sometimes I do a triple cheese blend – because more is more when it comes to cheese!
Flavor Boosters
Want to jazz things up? Throw in:
- Diced mushrooms: Sauté with the onions for umami magic
- Jalapeños: Fresh in the filling or pickled on top
- Sun-dried tomatoes: Chop fine and mix in for concentrated flavor
- Worcestershire sauce: Just a splash adds depth
My husband’s favorite version has crispy bacon bits mixed into the filling – because bacon makes everything better, right?
The moral of the story? Don’t be afraid to play with your food! Some of my best kitchen discoveries happened when I was out of an ingredient and had to improvise. The only rule? Taste as you go and have fun with it!
Serving Suggestions
Okay, let’s talk about making these stuffed peppers shine at the dinner table! Sure, they’re amazing all on their own, but a few simple additions can turn them into a full-on feast. Here’s how I love to serve them – trust me, your family will think you slaved for hours!
The Perfect Pairings
First up – toppings! A little dollop of:
- Sour cream: The cool tang cuts through the richness perfectly
- Guacamole: Because avocado makes everything better
- Salsa: For a fresh, bright contrast
- Hot sauce: If you like some heat (I’m looking at you, Cholula lovers!)
Side Dish Stars
For sides, keep it simple but satisfying:
- Garden salad: My go-to – just greens, cucumber, and light vinaigrette
- Garlic bread: Because carbs are life (and perfect for scooping up any filling that escapes)
- Roasted potatoes: Crispy on the outside, fluffy inside – toss them in the air fryer while the peppers cook!
- Corn on the cob: In summer, nothing beats fresh sweet corn
Pro tip: If you’re serving guests, arrange the peppers on a big platter with all the toppings in little bowls around them – it looks so impressive but took you zero extra effort!
Presentation Matters
Here’s my little secret – how you plate these makes all the difference:
- Slice peppers in half diagonally for a fancy look
- Sprinkle with fresh herbs (parsley or cilantro)
- Drizzle with a balsamic reduction if you’re feeling fancy
- Serve on a bed of greens for color contrast
Last night I served these with just a simple wedge of lemon on the side – a quick squeeze brightens up all the flavors beautifully. Sometimes the simplest touches make the biggest impact!
Storing and Reheating
Okay, let me tell you my best leftover tricks – because let’s be real, these stuffed peppers might not last long, but when they do (miracle of miracles!), you’ll want to enjoy them just as much the next day. Here’s how to keep that deliciousness going strong:
Storing Like a Pro
First things first – let those stuffed peppers cool completely before storing (about 30 minutes). Trust me, I learned this the hard way when condensation made my fridge containers all soggy! Then:
- Fridge: Keep in airtight containers for up to 3 days – separate any toppings like sour cream
- Freezer: Wrap individually in foil, then bag them – good for 2 months (thaw overnight in fridge)
Smart tip: Write the date on containers with a dry-erase marker – future you will appreciate it!
Reheating Magic
Now for the comeback tour! The air fryer is your best friend here – it brings back that perfect texture:
- From fridge: 350°F for 5 minutes (spritz lightly with oil first for crispness)
- From frozen: 375°F for 10-12 minutes (no need to thaw first!)
- Oven option: 375°F for 10 minutes covered with foil
Microwave works in a pinch (1-2 minutes), but the peppers won’t stay crisp. Still tasty though – I’ve definitely done this at the office!
Confession time: Sometimes I make extra just to have leftovers – they’re that good reheated! The flavors actually deepen overnight. Just wait till you taste day-two peppers – you might start “accidentally” making too many on purpose like I do!
Nutrition Information
Okay, let’s talk numbers – but don’t worry, I’m not about to turn this into a math class! These nutrition estimates are based on exactly how I make these stuffed peppers, but remember – your mileage may vary depending on your ingredients. Here’s the scoop per serving (that’s one glorious stuffed pepper):
- Calories: Around 320 (give or take depending on your cheese enthusiasm!)
- Protein: 22g – not bad for something that tastes this indulgent!
- Carbs: 20g (less if you skip the rice or use cauliflower rice)
- Fiber: 3g from those beautiful bell peppers
- Fat: 18g (but hey, we’re not counting – we’re enjoying!)
Quick disclaimer: These numbers are estimates – your actual nutrition will depend on the exact ingredients you use. I calculate based on 85/15 ground beef and regular white rice, but if you swap for turkey and cauliflower rice? Whole different ballgame!
Honestly though? When something tastes this good and comes together this easily, I’m not stressing over every gram. It’s a balanced meal packed with protein and veggies – that’s a win in my book! Now go enjoy that cheesy goodness guilt-free.
Common Questions About Air Fryer Stuffed Peppers
I get so many questions about these stuffed peppers – and trust me, I’ve asked them all myself at some point! Here are the answers to everything you might be wondering:
Can I use frozen peppers instead of fresh?
I’ve tried it in a pinch – they’ll work but won’t be quite as crisp. Thaw them completely and pat SUPER dry first (like, seriously, get all that moisture out). They might need an extra minute or two in the air fryer too. Fresh is always best though – that satisfying crunch is half the magic!
How do I keep the peppers from getting soggy?
Oh honey, I feel this struggle! My three golden rules: 1) Don’t overstuff with wet filling, 2) Make sure your cooked rice isn’t mushy, and 3) Don’t skip the pre-cook on the beef mixture – that extra simmer helps evaporate moisture. Also, eat them right away if you can – they get softer as they sit (still tasty though!).
Can I prep these ahead of time?
Absolutely! I do this all the time for busy weeknights. You can:
- Prep the filling up to 2 days ahead (store separately from hollowed peppers)
- Assemble completely (unbaked) and refrigerate for 12 hours max
- Add cheese just before cooking – it gets weird if refrigerated on top
Just add 1-2 extra minutes to the air fry time if starting cold. Game changer for easy dinners!
Why did my cheese burn before the peppers cooked?
Been there, smelled that! Try these fixes:
- Tent loosely with foil for the first 8 minutes
- Add cheese halfway through cooking
- Use thicker shreds (pre-shredded often has anti-caking powder that burns)
- Move to a lower rack if your air fryer has one
My personal trick? I wait until the last 3 minutes to add cheese – perfect melt every time!
Can I make these without rice?
You bet! The rice mainly adds texture and stretches the filling. Try:
- Extra sautéed veggies (mushrooms or zucchini work great)
- Cooked lentils or quinoa
- Just more meat (though it’ll be richer)
- Or nothing at all – the peppers will still be delicious!
My keto friend uses riced cauliflower and raves about it. Basically, there are no rules – make it your own!
Try This Recipe Tonight and Share Your Results in the Comments!
Alright, my fellow food lover – you’ve got all my best tricks for making these incredible air fryer stuffed peppers! Now it’s your turn to work that kitchen magic. I’m telling you, once you taste that first cheesy, beefy bite, you’ll be hooked just like I was. The hardest part is waiting those agonizing 5 minutes before digging in (but I promise, it’s worth it!).
I want to hear all about your stuffed pepper adventures! Did you go wild with the add-ins? Maybe you discovered an amazing new cheese combo? Or did your picky eater actually clean their plate for once? Drop your stories, tweaks, and even your “oops” moments in the comments – we’ve all been there! Your tips might just help another home cook create their new favorite meal.
Now grab those peppers and get cooking – your future delicious dinner is waiting! Don’t forget to tag me if you share pics online. Happy air frying, friends!
Print
30-Minute Air Fryer Ground Beef Stuffed Peppers Recipe
- Total Time: 30 mins
- Yield: 4 servings
- Diet: Low Carb
Description
Make flavorful stuffed peppers with ground beef using your air fryer for a quick and tasty meal.
Ingredients
- 4 large bell peppers (any color)
- 1 lb ground beef
- 1/2 cup cooked rice
- 1/2 cup diced onion
- 1/2 cup shredded cheese
- 1 tsp garlic powder
- 1 tsp salt
- 1/2 tsp black pepper
- 1/2 cup tomato sauce
Instructions
- Cut the tops off the bell peppers and remove seeds.
- Cook ground beef in a pan until browned. Add onion and cook until soft.
- Mix in cooked rice, garlic powder, salt, black pepper, and tomato sauce.
- Stuff the peppers with the beef mixture and sprinkle cheese on top.
- Place peppers in the air fryer basket. Cook at 375°F for 12-15 minutes.
- Serve warm.
Notes
- Use any color bell peppers for variety.
- For extra flavor, add spices like paprika or cumin.
- Leftovers can be stored in the fridge for up to 3 days.
- Prep Time: 15 mins
- Cook Time: 15 mins
- Category: Main Dish
- Method: Air Fryer
- Cuisine: American